Contents
Heart Rate Training for Runners: A Complete Guide
Master heart rate-based training to run smarter, not just harder. Learn to set your zones, train effectively, and avoid the common mistakes that hold runners back.
Quick Hits
- •Heart rate measures internal effort—useful because pace doesn't tell the whole story
- •Most runners train too hard on easy days; heart rate helps enforce true recovery
- •Your max heart rate is individual—formulas are estimates at best
- •Zone 2 (easy aerobic) should be 75-80% of your training time
- •Heart rate lags effort and is affected by heat, caffeine, sleep, and stress
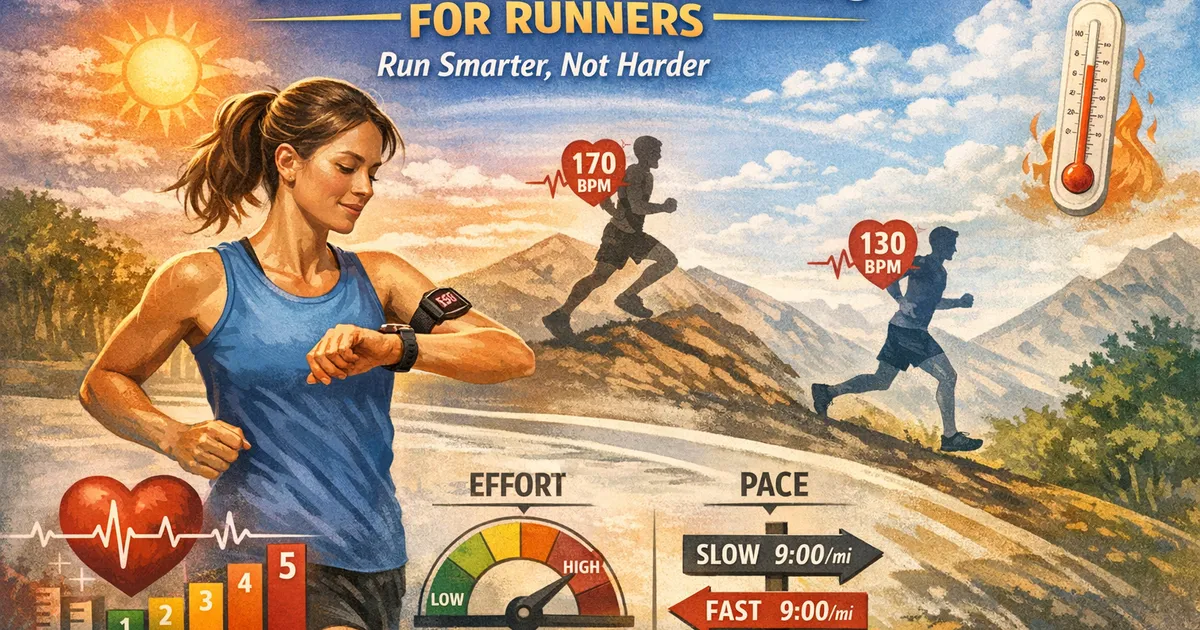
Every runner eventually asks: "Am I training at the right intensity?"
Pace alone can't answer this question. The same 9:00/mile pace might be easy on a cool morning after good sleep—and brutally hard in summer heat after a stressful week.
Heart rate offers another lens: measuring how hard your body is actually working, regardless of pace.
Why Heart Rate Matters
The Effort vs. Output Gap
Pace tells you how fast you're going. Heart rate tells you how hard your body is working to get there.
These aren't always aligned:
| Scenario | Pace | Heart Rate | What's Really Happening |
|---|---|---|---|
| Cool morning, fresh | 8:30/mi | 140 bpm | Easy effort, good output |
| Hot afternoon, tired | 8:30/mi | 165 bpm | Hard effort, same output |
| Hill running | 10:00/mi | 155 bpm | Hard effort, low output |
| Downhill running | 7:30/mi | 135 bpm | Easy effort, high output |
Heart rate reveals the hidden cost of various conditions. This matters for training in the right zones.
The Problem Heart Rate Solves
Most self-coached runners make the same mistake: running too hard on easy days.
Without heart rate feedback, "easy" becomes "whatever pace feels reasonable"—which tends to drift toward moderate effort over time.
Heart rate provides an objective check:
- "I feel fine at 9:00 pace" → but HR says 160 bpm
- 160 bpm is moderate-hard territory
- True easy would be lower (perhaps 140-145 bpm)
- Conclusion: Slow down despite how it feels
This enforcement of easy days is heart rate training's biggest benefit.
Setting Your Heart Rate Zones
Finding Your Maximum Heart Rate
Your zones are based on your maximum heart rate (MHR), so getting this right matters.
Methods (least to most accurate):
1. Formula (least reliable):
- 220 - age = MHR (old formula)
- 206.9 - (0.67 × age) = MHR (slightly better)
- Individual variation can be ±20 beats
2. Recent race effort: Look at your highest HR from a recent hard 5K or shorter race. This is close to max, usually within 5 beats.
3. Uphill repeats test:
- Warm up 15 minutes
- Find a steep hill (6-8% grade)
- Run hard up for 3-4 minutes
- Jog down to recover
- Repeat 2-3 times, going harder each time
- Note highest HR achieved
4. Lab test (most accurate): A graded exercise test with medical supervision. Worth it if you're serious about training.
The Five-Zone Model
Once you have max HR, calculate your zones:
| Zone | % of Max HR | Name | Feel |
|---|---|---|---|
| 1 | 50-60% | Recovery | Very easy, barely feels like exercise |
| 2 | 60-70% | Easy Aerobic | Conversational, could do this for hours |
| 3 | 70-80% | Moderate/Tempo | Comfortably hard, sentences only |
| 4 | 80-90% | Threshold | Hard, few words at a time |
| 5 | 90-100% | VO2max/Anaerobic | Very hard, cannot talk |
Example for MHR of 180:
- Zone 1: 90-108 bpm
- Zone 2: 108-126 bpm
- Zone 3: 126-144 bpm
- Zone 4: 144-162 bpm
- Zone 5: 162-180 bpm
Use the Heart Rate Zone Calculator to set your personalized zones.
Alternative: MAF Method
Phil Maffetone's MAF (Maximum Aerobic Function) formula:
- MAF HR = 180 - age
- Adjust: +5 if you're fit and healthy, -5 if recovering from illness
This gives a single aerobic ceiling rather than multiple zones. Keep all easy running below this number.
Example for a healthy 40-year-old:
- MAF = 180 - 40 + 5 = 145 bpm
- All easy running stays under 145 bpm
The MAF method is simple and effective for building aerobic base.
Training in Each Zone
Zone 1: Recovery
Purpose: Active recovery, blood flow, very easy movement
When to use:
- Recovery runs after hard efforts
- Second runs on double days
- When fatigued but wanting to move
How it feels: You might feel silly going this slow. That's the point.
Common mistake: Treating Zone 1 as your default easy pace. It's even easier than easy.
Zone 2: Easy Aerobic (The Foundation)
Purpose: Build aerobic base, fat oxidation, mitochondrial development
When to use:
- Most easy runs (75-80% of training)
- Majority of long run time
- Building weekly volume
How it feels: Truly conversational. Could talk in full paragraphs. Sustainable for hours.
Common mistake: Running Zone 2 at the high end (70%). Most Zone 2 should be 60-65% of max.
This is where endurance is built. See Aerobic Base 101 for why this matters.
Zone 3: Moderate/Tempo (The Gray Zone)
Purpose: Very limited—mostly a transition zone
When to use:
- Rarely as an intentional training zone
- Maybe during progressive long runs
- Marathon pace running for some runners
How it feels: "Comfortably hard"—can talk, but prefer not to.
The problem: Zone 3 is too hard to maximize aerobic development, too easy to develop speed. Training here often means running hard enough to accumulate fatigue without getting the benefits of truly hard work.
This is the "gray zone" that holds many runners back. See Stuck in the Gray Zone.
Zone 4: Threshold
Purpose: Improve lactate clearance, race-specific fitness
When to use:
- Tempo runs
- Cruise intervals
- Half marathon to marathon race pace work
How it feels: Hard but controlled. Can speak a few words. Sustainable for 20-60 minutes.
Typical workouts:
- 20-40 minute tempo run
- 3-4 × 8-10 min at tempo with short rest
- Long run with tempo segments
Zone 5: VO2max/Anaerobic
Purpose: Develop maximum aerobic capacity, speed
When to use:
- Interval sessions
- Hill repeats
- Racing hard (5K, 10K)
How it feels: Very hard. Cannot talk. Sustainable for 3-8 minutes.
Typical workouts:
- 5 × 1000m with equal recovery
- 8 × 800m at 5K pace
- Hill repeats: 8 × 90 seconds hard
The 80/20 Distribution
Why It Works
Research consistently shows elite endurance athletes train with roughly:
- 80% in Zones 1-2 (easy)
- 20% in Zones 4-5 (hard)
- Very little in Zone 3 (moderate)
This "polarized" distribution builds a massive aerobic base while allowing quality in hard sessions.
What Most Runners Actually Do
Without HR monitoring, most runners train:
- 50-60% moderate (Zone 3)
- 20-30% easy (Zones 1-2)
- 20-30% hard (Zones 4-5)
This "threshold" distribution feels productive but produces worse results. Every run feels somewhat hard, recovery is compromised, and hard days aren't hard enough.
Using HR to Fix Your Distribution
Heart rate training's primary value: enforcing Zone 1-2 on easy days.
By keeping easy runs genuinely easy:
- You recover fully between hard sessions
- Hard sessions can actually be hard
- Aerobic base develops properly
- Training becomes sustainable
Use the Training Intensity Distribution Calculator to analyze your training.
Heart Rate Quirks and Limitations
Cardiac Drift
During long runs, heart rate gradually rises even at constant effort. This "drift" is normal—caused by dehydration, heat accumulation, and glycogen depletion.
What to do: Accept 5-10 bpm drift in long runs. Don't slow dramatically just to hit a number.
Temperature Effects
Heat significantly elevates heart rate. The same effort that produces 140 bpm in 50°F might produce 160 bpm in 85°F.
What to do: Adjust expectations in heat. Accept higher HR at the same effort, or slow down to stay in zone.
Caffeine and Stimulants
Caffeine can elevate heart rate by 5-15 bpm without changing actual effort.
What to do: Be consistent with caffeine timing, or factor in the elevation.
Sleep and Stress
Poor sleep and high life stress elevate baseline heart rate. Easy runs feel harder and HR runs higher.
What to do: Use elevated easy-run HR as a signal to back off training, not push through.
Lag Time
Heart rate doesn't respond instantly. It takes 1-2 minutes to rise at the start of exercise and lags during intervals.
What to do: Don't judge interval effort by HR during the interval—it's useful for recovery between reps instead.
When to Ignore Heart Rate
Heart rate is a tool, not a dictator. Ignore it when:
During Hard Workouts
Target pace or power often matters more than HR during intervals. Hit the pace; let HR be what it is.
When It's Obviously Wrong
Wrist sensors sometimes read absurdly high or low. If your HR says 200 while you're jogging easily, it's sensor error.
During Races
Race by effort and pace, not HR. The stress of racing elevates HR beyond normal training relationships.
When You Feel Terrible Despite "Good" HR
If you feel awful but HR says you're in Zone 2, something else is wrong. Don't force a run because the numbers look okay.
When You Feel Great Despite "High" HR
Some days HR runs high and you feel fine. Context matters—maybe it's hot, maybe you had coffee, maybe your watch is wrong.
Practical Heart Rate Training
For Easy Runs
- Determine your Zone 2 ceiling (approximately 70% of max)
- Start your run easy
- If HR exceeds Zone 2, slow down
- Accept that this might be slower than you'd like
- Trust the process
For Long Runs
- Stay in Zone 2 for most of the run
- Allow 5-10 bpm drift over time
- Final miles may exceed Zone 2—that's okay
- If doing a progression long run, finish in Zone 3-4
For Quality Sessions
- Use HR to ensure adequate recovery between intervals
- HR should drop to Zone 2-3 before next rep
- Don't judge interval quality by HR—judge by pace
- Cool-down should bring HR to Zone 2
For Recovery Days
- Stay in Zone 1-2 only
- If HR wants to go higher, slow to a walk
- Short duration (20-40 minutes)
- Resist ego—recovery runs should be very slow
Getting Started with HR Training
Week 1-2: Just Observe
Wear your HR monitor on all runs. Don't change anything—just collect data.
Notice:
- What zones you naturally spend time in
- How HR relates to perceived effort
- When HR runs unusually high or low
Week 3-4: Enforce Easy Days
Start keeping easy days in Zone 2. This might require significant slowing.
Expect:
- Frustration at slow paces
- Feeling like you're not working hard enough
- Improvement in recovery
Week 5+: Refine and Trust
As you accumulate Zone 2 time:
- Easy pace at the same HR will gradually improve
- Recovery between hard days will improve
- You'll develop intuition for zones without constantly watching
Heart rate training isn't magic—it's a tool for ensuring you train at the right intensity. The real magic happens when you stop running every run at moderate effort and start polarizing: easy days truly easy, hard days truly hard.
The watch doesn't make you fit. But it can keep you honest about the effort you're actually putting in.
Check your zones with the Heart Rate Zone Calculator.
Key Takeaway
Heart rate training isn't about obsessing over numbers—it's about ensuring your easy days are easy enough and your hard days are hard enough. Use it as a guide, not a prison, and remember that how you feel still matters most.
Frequently Asked Questions
How do I find my maximum heart rate?
Why is my heart rate so high on easy runs?
What is Zone 2 training and why does everyone talk about it?
Should I use heart rate or pace for training?
Is a chest strap or wrist sensor better?
References
- Maffetone Method
- Heart rate variability research
- Zone training studies